Inviting Team Members
Add team members to your workspace
Linkkit allows you to invite teammates to collaborate inside your workspace. Members can help manage links, organize Segments, and track performance — depending on their assigned role.
How to Invite a Member
Follow these steps to invite someone to your workspace:
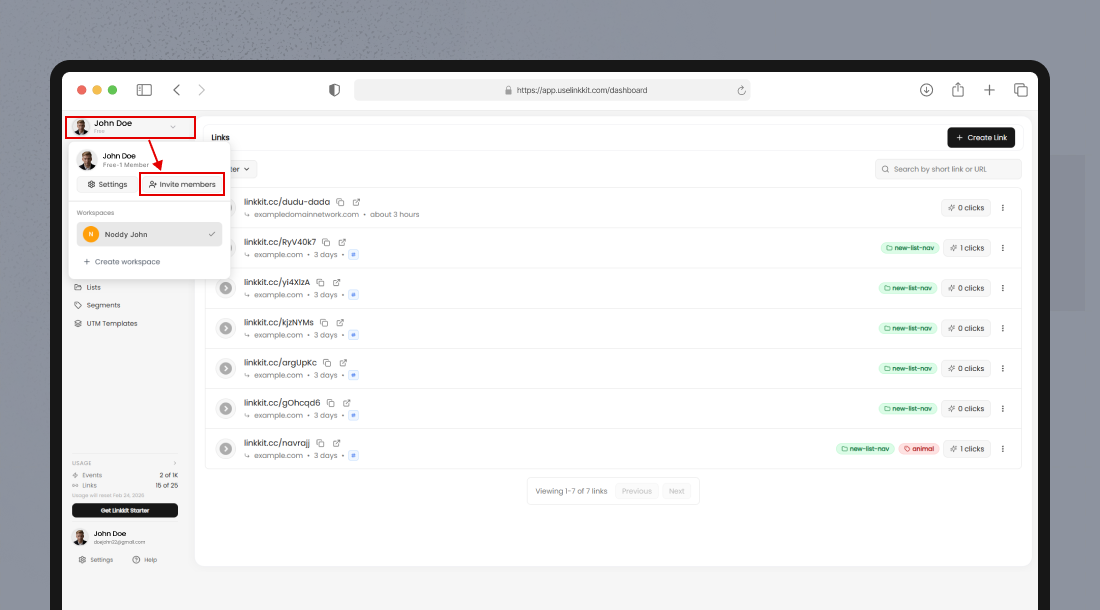
1. Go to Workspace Settings
Open your Linkkit dashboard
Navigate to Settings → Members
You’ll see the Workspace Members section
2. Click “Invite Member”
Click the + Invite Member button.
This opens the Invite Members modal.
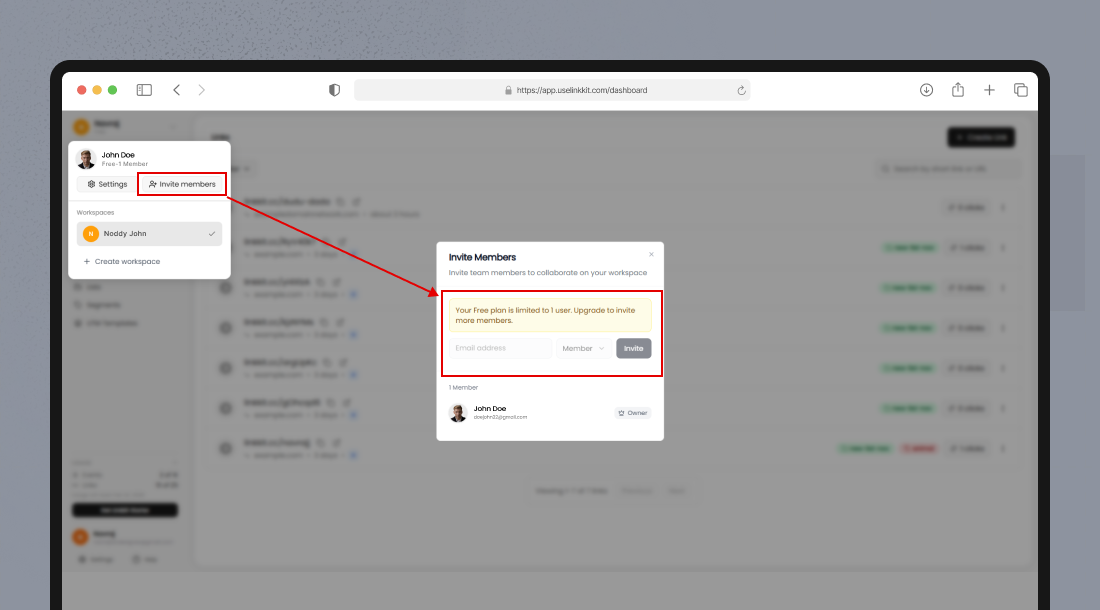
3. Enter Member Details
Inside the modal:
Email address — Enter the user’s email
Role dropdown — Select a role (e.g., Member)
Click Invite
The user will receive an email invitation to join your workspace.
They must accept the invite before gaining access.
Understanding Roles
Each member is assigned a role that determines their permissions.
Common roles include:
Owner — Full control, including billing and workspace settings
Member — Can create and manage links within the workspace
Your current role appears next to your name (for example, “Owner” badge in the member list).
Free Plan Limitation
If you’re on the Free plan, you’ll see this message in the Invite modal:
“Your Free plan is limited to 1 user. Upgrade to invite more members.”
This means:
Only 1 workspace user is allowed
You must upgrade your plan to invite additional members
To add more teammates, upgrade your subscription from the Billing section.
Managing Member Invitations
After inviting members to your workspace, you may need to monitor invitation status, resend invites, or remove access.
This section explains how invitation states and member management work in Linkkit.
Invitation Status Types
Member invitations fall into two categories:
Pending
Accepted (Active)
Understanding the difference helps you manage access properly.
Pending Invitations
A Pending invite means the user has been invited but hasn’t accepted yet.
What This Means
The invitation email has been sent
User does not have workspace access
The role is not active yet
Available Actions
Resend the invitation
Cancel or remove the pending invite
If the user didn’t receive the email, ask them to:
Check spam/junk folder
Confirm the email address
You can resend the invite if necessary.
Accepted Invitations
Once the user accepts:
Status becomes active
They appear in the Workspace Members list
Their assigned role is activated
They gain immediate access based on permissions
You can later:
Change their role
Remove them from the workspace
Removing a Member
If someone no longer needs access, you can remove them.
Steps
Go to Settings → Members
Locate the member
Open the action menu
Click Remove
Confirm
After Removal
Access is revoked immediately
They can no longer manage links or view data
Only Owners (and Admins, if applicable) can remove members.
Re-Inviting a Removed Member
If removed by mistake:
Send a new invitation
Reassign their role
Previous permissions are not automatically restored
Important Notes
Owners cannot remove themselves without transferring ownership.
Free plan accounts are limited to 1 workspace user.
Removing a member does not delete the links they created.
Managing Existing Members
Inside Settings → Members, you can:
View all workspace members
See their assigned roles
Identify the workspace Owner
Depending on your role, you may also be able to:
Change a member’s role
Remove a member from the workspace
Security Best Practices
To keep your workspace secure:
Only invite trusted team members
Assign the lowest necessary permission level
Remove access when someone no longer needs it
Regularly review your member list