API Authentication
Generate and use API keys for authentication
To securely access the Linkkit API, all requests must be authenticated using your unique API key. This ensures that only authorized applications and integrations can interact with your link management data, campaign settings, segments, and analytics.
This page explains how authentication works, how to generate and use your API key, and best practices for keeping your integration secure.
What Is API Authentication?
The Linkkit API uses a simple, secure key-based authentication system. Each request you make must include your API key in the request header. This verifies your identity and allows Linkkit to authorize access to the resources you’re requesting.
Without proper authentication, the API will reject your calls and return an error.
How to Generate Your API Key
To begin integrating with the Linkkit API, first generate your API key from your Linkkit dashboard.
Steps to Generate an API Key:
Log in to your Linkkit account.
Go to Settings → API Keys.
Click Generate API Key.
Copy your key and save it somewhere secure.
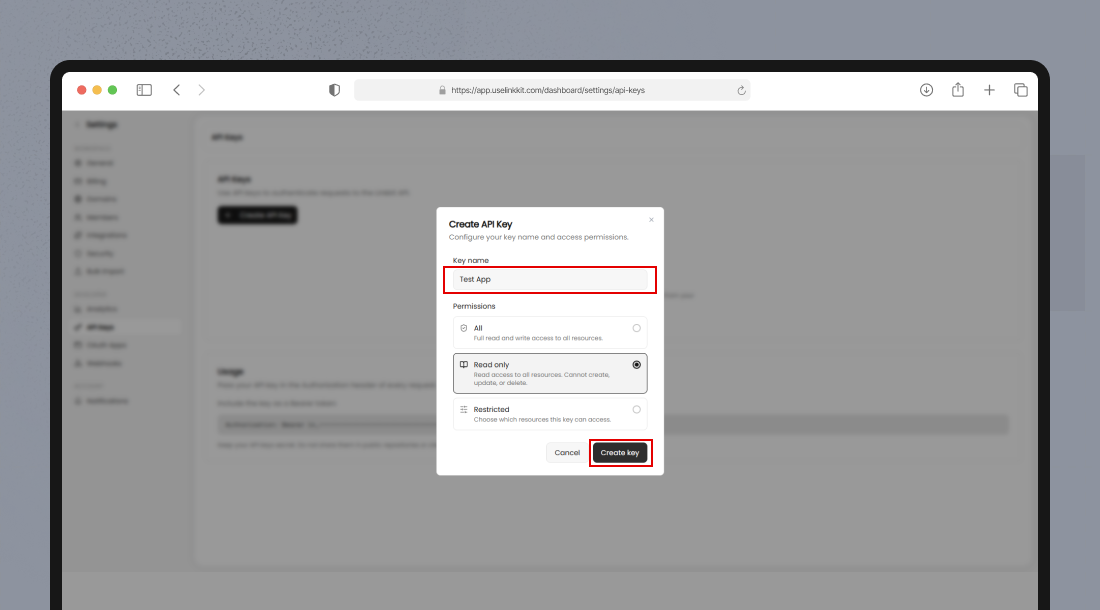
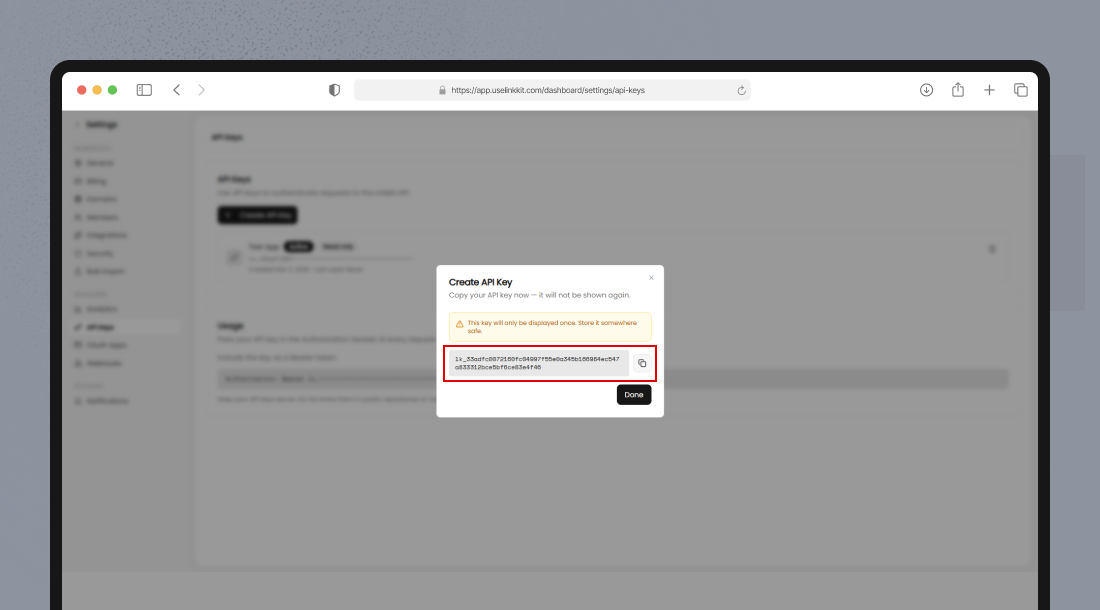
Keep your API key private — treat it like a password. Never expose it in client-side JavaScript or public code repositories.
How Authentication Works
Every request to the Linkkit API must contain two required headers:
Required HTTP Headers
Authorization: Bearer YOUR_API_KEY
Content-Type: application/json
Authorization — Includes “Bearer” followed by your API key.
Content-Type — Always set to
application/jsonfor API requests.
If your API key is missing or invalid, the API will return a 401 Unauthorized error.
Example: Authenticate Using cURL
Here’s how to authenticate a simple API request using curl:
curl -X GET "https://api.uselinkkit.com/v1/links" \
  -H "Authorization: Bearer YOUR_API_KEY" \
  -H "Content-Type: application/json"
Replace YOUR_API_KEY with the key you generated in your Linkkit dashboard.
This request fetches all links associated with your account.
Example: Authenticate in JavaScript (Node.js)
Here’s a quick example using Node.js with axios:
import axios from "axios";

const apiKey = process.env.LINKKIT_API_KEY;

axios.get("https://api.uselinkkit.com/v1/links", {
    headers: {
      "Authorization": `Bearer ${apiKey}`,
      "Content-Type": "application/json",
    },
})
.then(response => {
    console.log(response.data);
})
.catch(error => {
    console.error(error.response.data);
});
Authentication Errors
Here are common errors you might encounter:
Error Code | Message | Meaning |
|---|---|---|
401 | Unauthorized | Missing or incorrect API key |
403 | Forbidden | API key does not have permission |
429 | Too Many Requests | Rate limit exceeded |
500 | Server Error | Issue on Linkkit side |
If you receive an error, verify that:
You included the
AuthorizationheaderYour API key is correct
You are calling the correct API version URL
Best Practices for Security
To keep your API integration secure and reliable:
Store API Keys Safely
Use environment variables in server environments
Do not expose API keys in frontend code
Rotate Keys Periodically
Regenerate keys if they are compromised
Use separate keys for development and production
Use HTTPS
Always make API calls over HTTPS to encrypt your credentials
Limit Access
If possible, assign scoped or limited API access based on the environment
Following these practices helps maintain the security and integrity of your Linkkit integration.
Summary
To authenticate with the Linkkit API:
Generate an API key in your Linkkit dashboard
Add the key to your request header using the Bearer scheme
Always use secure HTTPS requests
Store your API key safely and rotate it when needed
With proper authentication, you gain secure, programmatic access to your Linkkit platform for automation, analytics, and customized workflows.